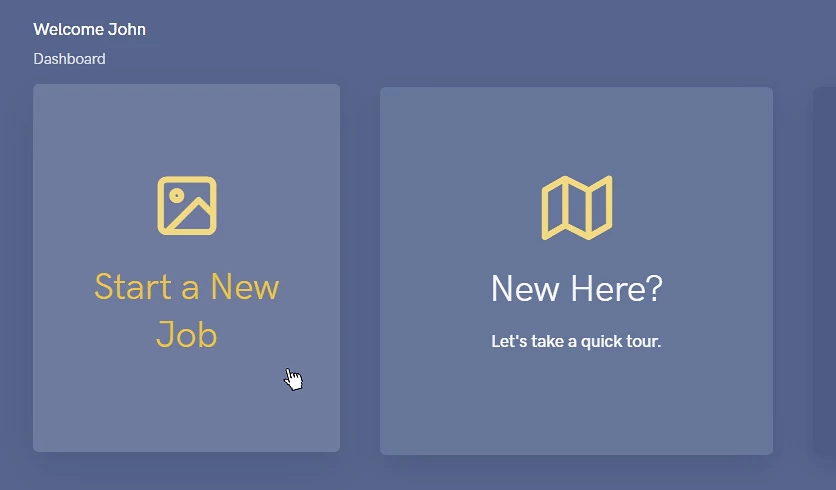
1.Start a New Job
From your Dashboard, select 'Start a New Job'
You can resume working on your job at any later time as your progress is automatically saved.
How to Guide.
Our step by step guide on how to complete your first job with us. If you still have any questions please contact us or visit our FAQ.
From your Dashboard, select 'Start a New Job'
You can resume working on your job at any later time as your progress is automatically saved.
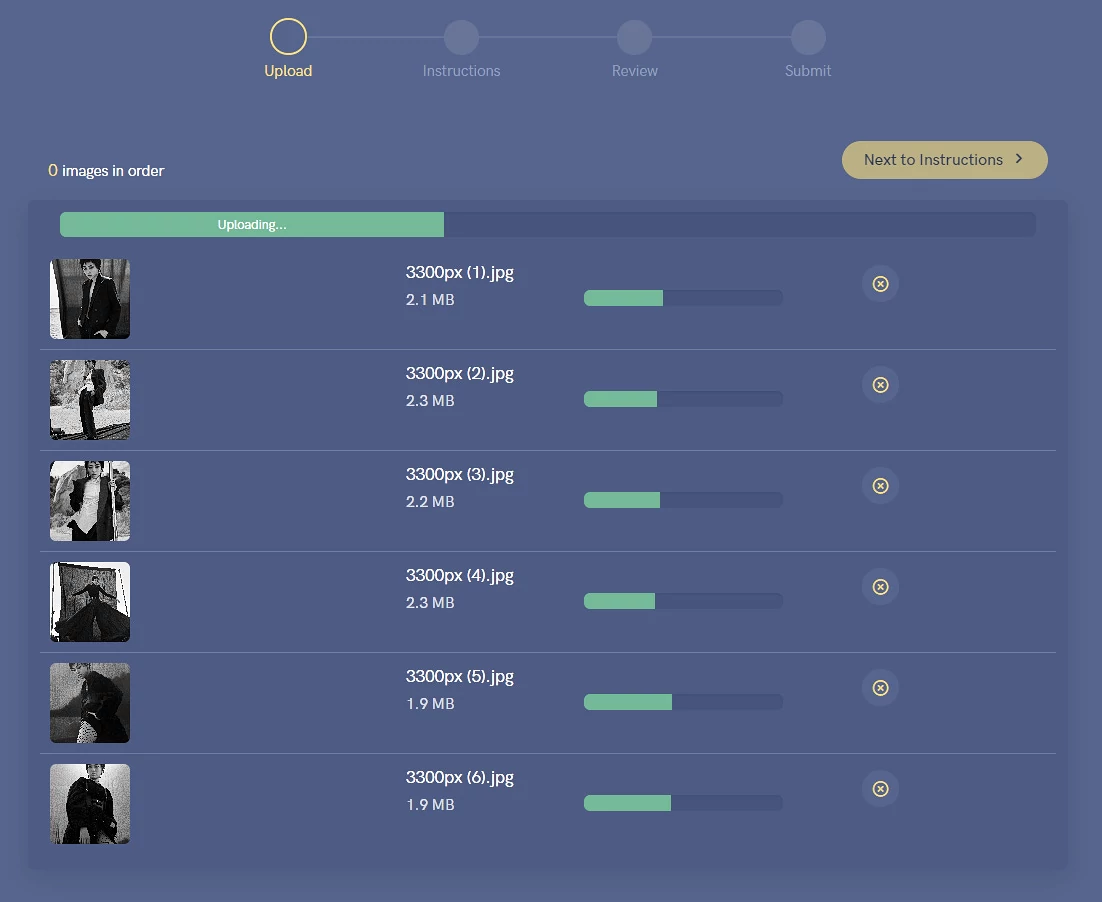
Add the images that you want edited or images to be used for reference. You can add up to 250 images per order and 500 MB per image.
You can come back and add more images anytime.
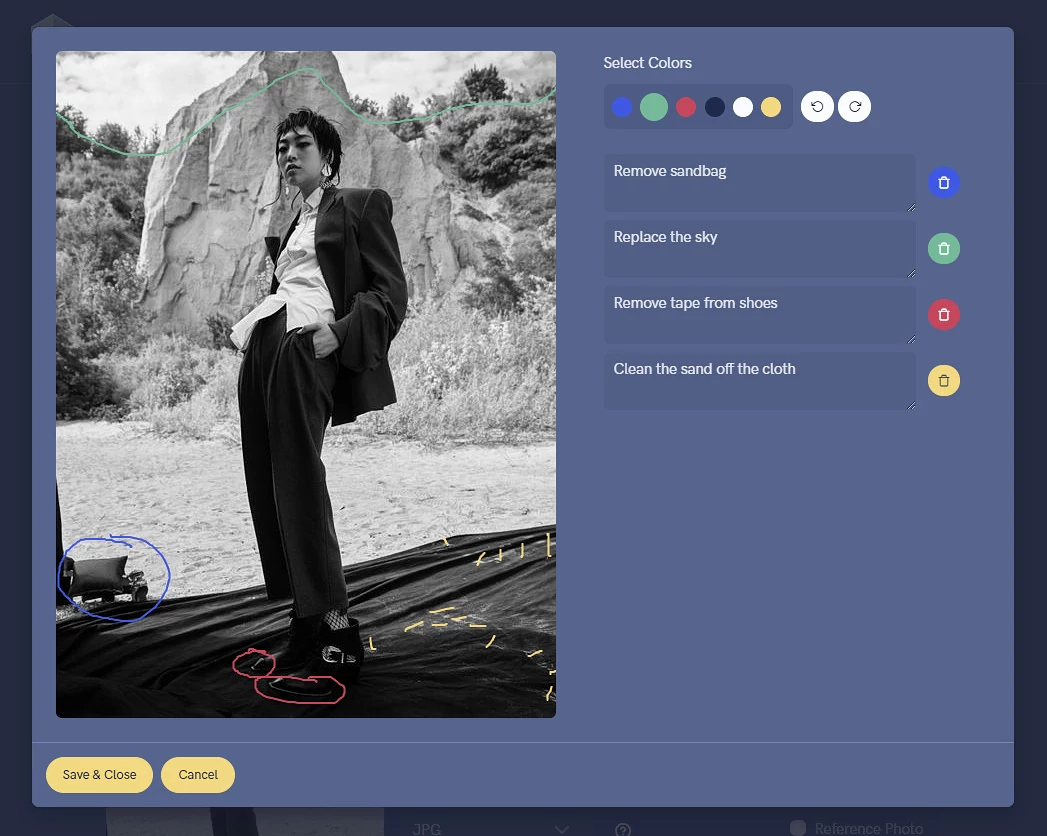
Let us know exactly what editing work you need done. The more detailed, the better.
You can also choose the image format you want returned to you (JPG is default).
You can select "Reference Photo" if it's not to be edited.

You can draw on the photo with our pen tool if you need to provide more detailed instructions.
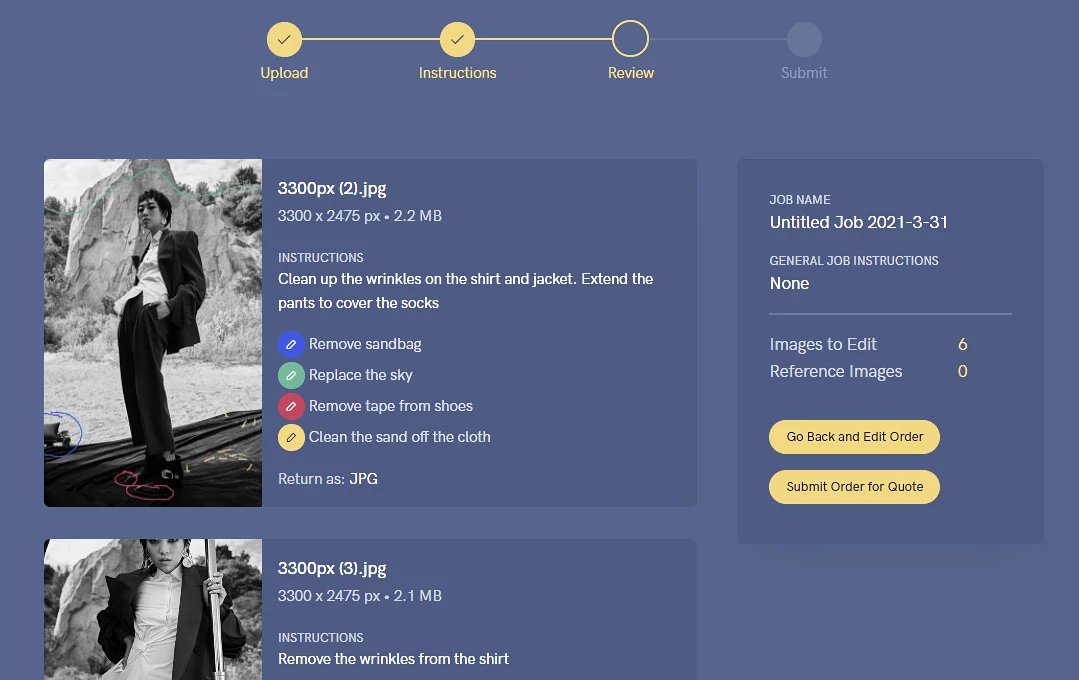
When you're done, preview your job carefully to make sure you've included all the instructions needed for us to complete your job.
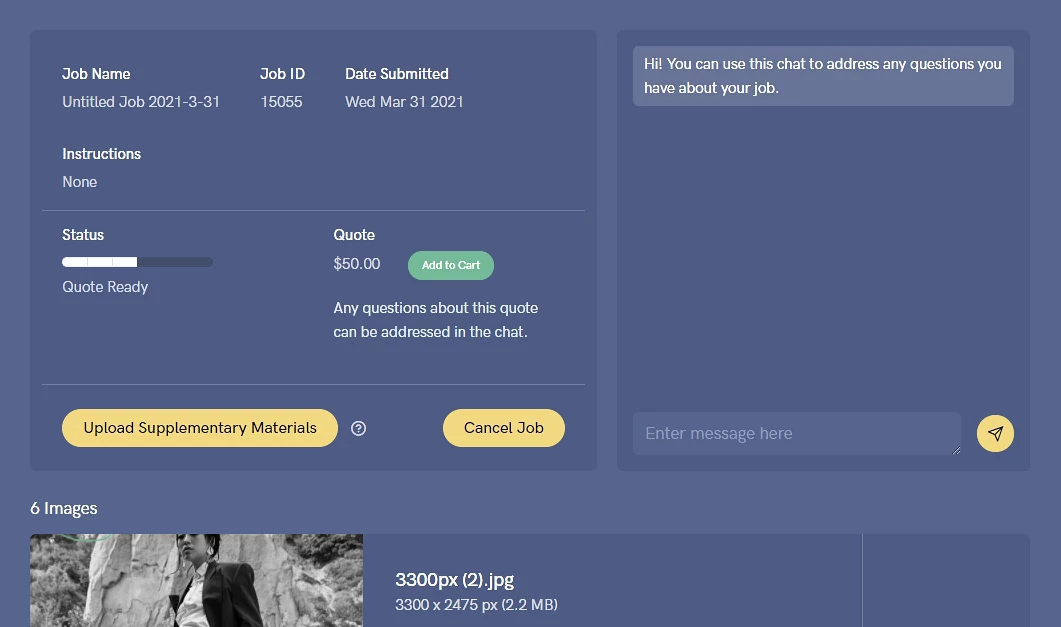
You'll shortly receive a quote after we review your job. If we need clarification on any aspect of your job we'll let you know.
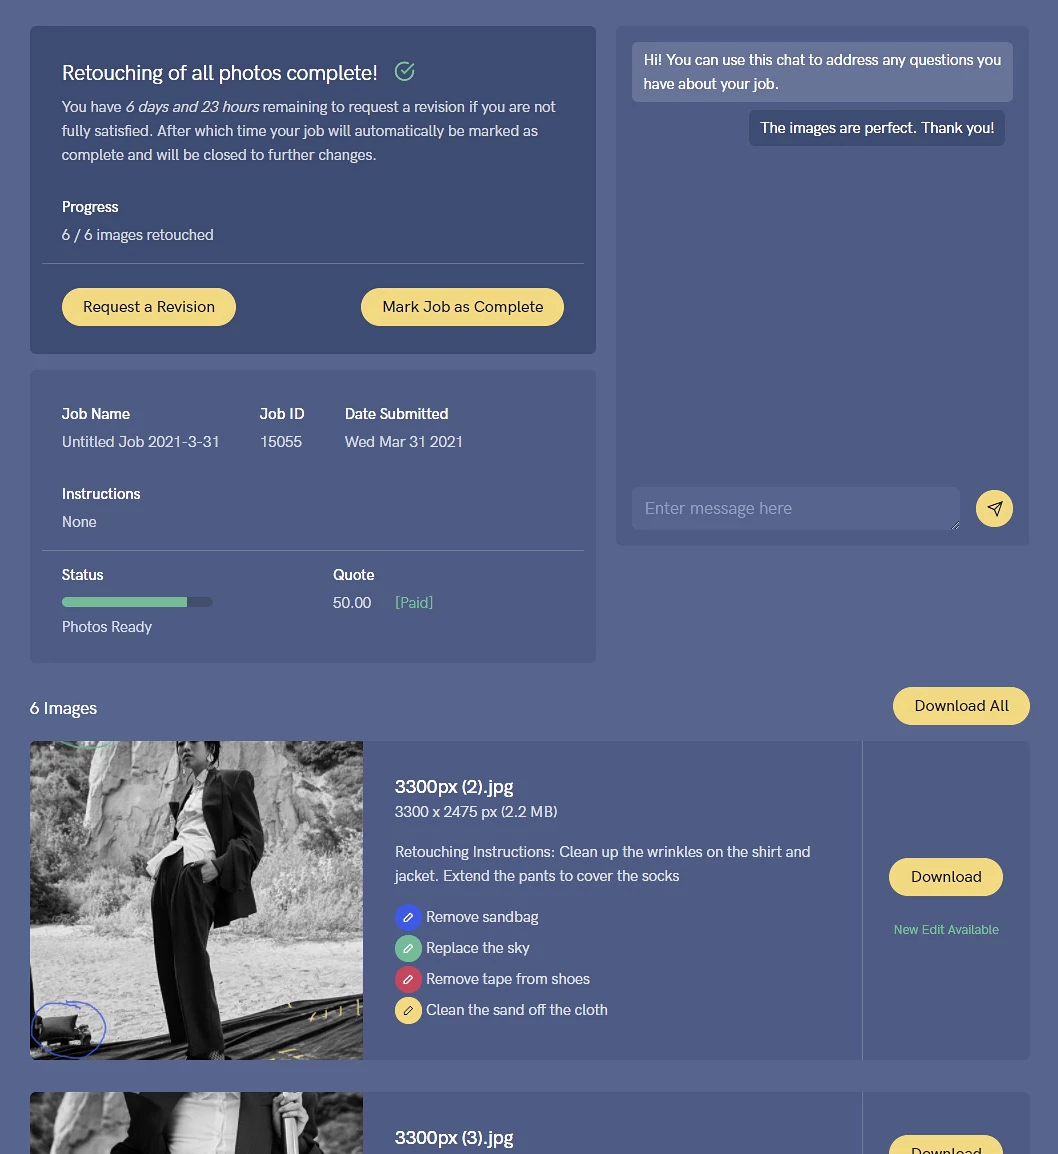
When your job is complete we'll notify you by email.
If you're not completely satisfied with the results you have 1 week to request a revision. We'll continue working on the job until you're happy.
 Sign in with Google
 Sign in with Facebook